(The third in a multi-part series)
Take Advantage of Limits and Shares to Maximize Virtual CPU Performance
In my last blog post I wrote about managing your virtual CPUs by maximizing performance with reservations. There are even more customizations you can make with virtual CPUs with limits, shares and advanced options.
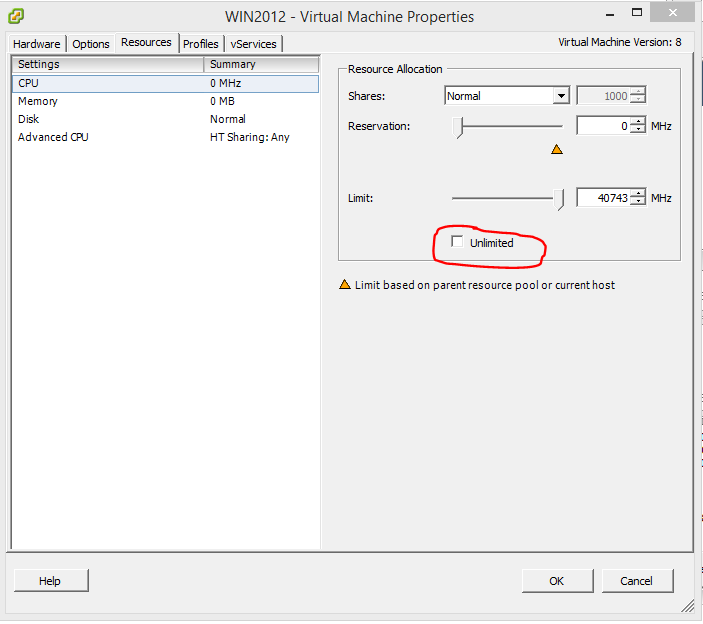
CPU limits define how much access a virtual CPU will get on a host’s physical CPU. This would be used on a development machine or a machine that has less priority than another virtual machine. Be aware that this does limit the performance of this virtual machine.
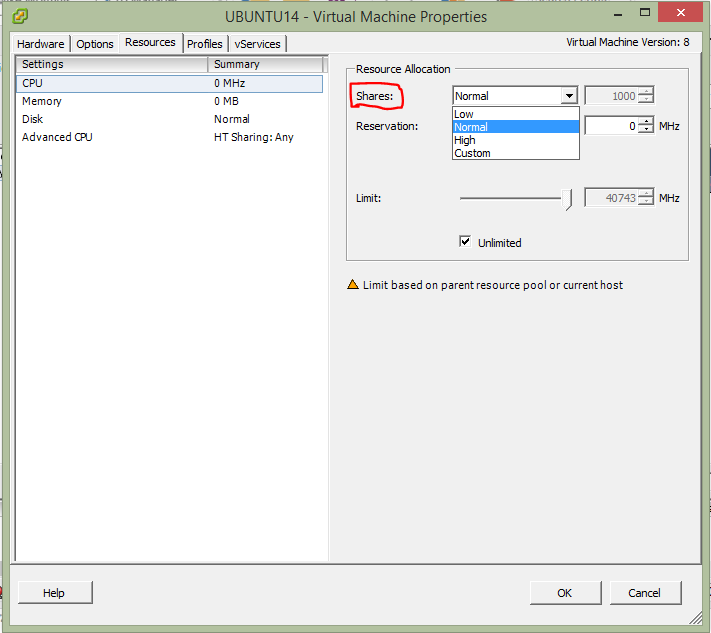
CPU shares are used to give different priorities to different virtual machines. CPU shares only matter when there is CPU contention. If you have enough CPU resources for all the virtual machines then shares do not mean much. Only when you are trying limit resources and make virtual machines share limited CPU resources do ‘shares’ actually matter.
See my previous blog post for how to get to the resources tab of a virtual machine.
CPU limits:
If you want to set a limit on a virtual machine CPU first check the unlimited checkbox.
Now move the selector tool to the desired MHz value or input the value in the “Limit” box.
For example: you have a virtual machine that only provides one service. This service only uses 100 MHz of CPU. Limit this virtual machine’s CPU to 500 MHz so that the rest of the CPU resources in the pool are available for the other virtual machines.
CPU shares:
If you plan on having enough resources in your resource pool for all or your virtual CPUs then feel free to skip this section and move onto the last one here :
While in the virtual machine properties, resources tab, the first option for CPU resource allocation is shares.
The low, normal and high shares values are 500, 1000, and 2000 respectively. The number values are completely arbitrary and only mean anything as a percentage difference from each other. Low is 50% of Normal which is 50% of High. The number could easily be 5, 10 and 20. It would mean the same shares value.
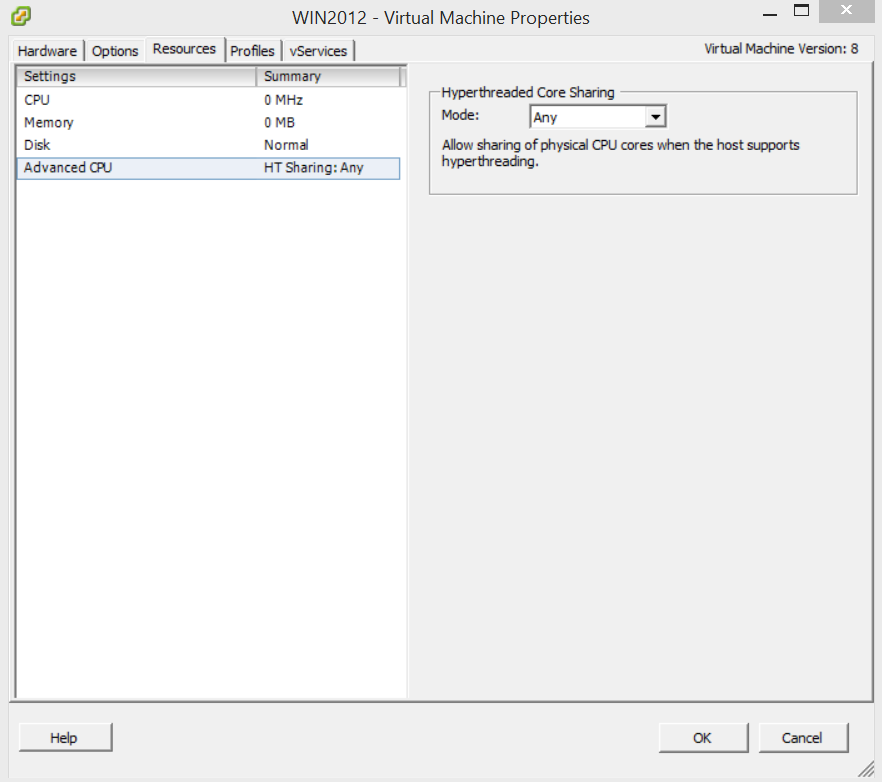
The modes available are Any, None and Internal.
Official documentation here: https://goo.gl/rZDaoZ
Any is the default setting and should be used in most cases.
None basically disables hyperthreading on your virtual machine. It sets for dedicated cores on the virtual machine. This setting should be reserved for applications that do not run well with hyperthreading. If you think you have a vm that requires this option set please contact vsystems helpdesk. In some cases setting this option to none can cause poor performance to the vm and other vms in your resource pool.
Internal means that this virtual machine can only share CPU with CPU on that same virtual machine.
When in doubt on the options here leave it set at the default, any. I hope you enjoyed this blog about advanced CPU options.


